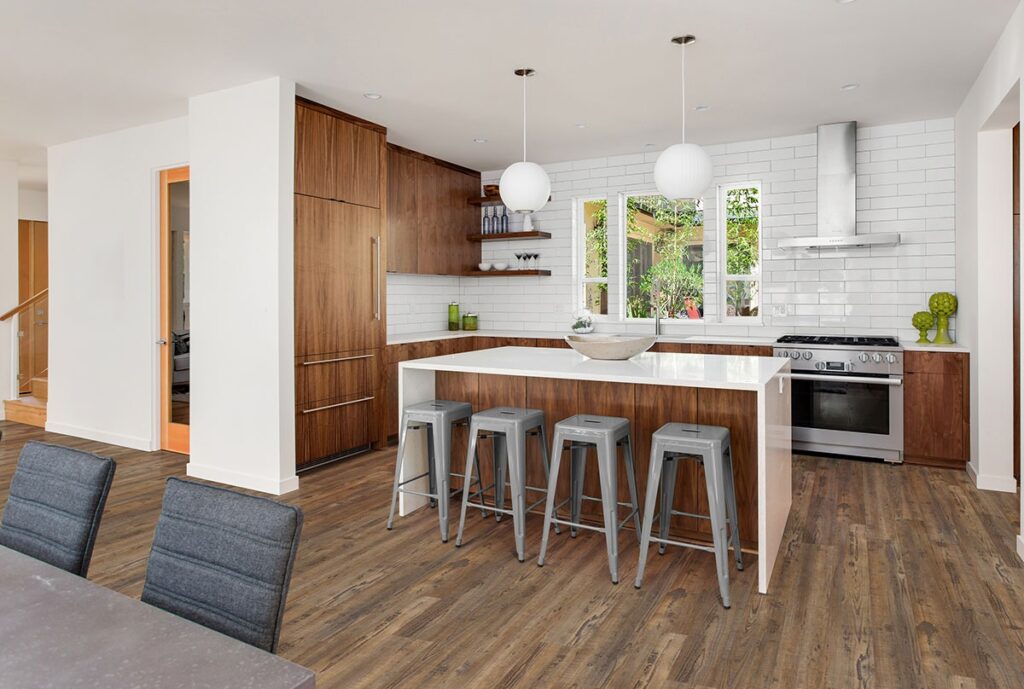
Luxury vinyl plank has become one of the most requested flooring options across Greenville, SC, Atlanta, GA, Charlotte, NC, and throughout the I-85 corridor. Homeowners appreciate its durability and design flexibility. Contractors value its speed of installation and consistent performance.
At The Flooring Supply, we connect flooring pros and homeowners with high-quality flooring at competitive prices, including LVP, LVT, and engineered hardwood. Whether you are a general contractor managing multiple builds or a homeowner tackling your first install, understanding how to install LVP flooring correctly is essential to achieving professional results.
This guide walks you through the full process, from preparation to final trim, so you can install flooring with confidence.
Why LVP Flooring Is a Smart Choice
Before we get into installation, it helps to understand why luxury vinyl plank continues to grow in popularity.
According to industry data from organizations such as the Resilient Floor Covering Institute (RFCI), resilient flooring products like LVP have seen steady growth due to their water resistance, durability, and lower lifecycle maintenance compared to traditional hardwood in moisture-prone environments.
Key advantages include:
- Water resistance suitable for kitchens, bathrooms, and basements
- Scratch resistance for pets and heavy foot traffic
- Dimensional stability compared to solid hardwood
- Lower maintenance requirements
- Strong return on investment for both homeowners and property investors
For contractors working in flooring in Greenville, flooring in Atlanta, or flooring in Charlotte, LVP flooring has become a practical solution that balances cost, performance, and installation efficiency.
Tools and Materials You Will Need
Installing LVP flooring does not require specialized equipment, but proper tools make a noticeable difference in results.
Basic Tools
- Tape measure
- Utility knife with sharp blades
- Straight edge or square
- Rubber mallet
- Tapping block
- Pull bar
- Spacers for expansion gaps
- Chalk line
Additional Materials
- Underlayment (if required by manufacturer)
- Transition strips
- Quarter round or baseboards
- Moisture barrier (for concrete subfloors if specified)
Using high-quality flooring products and following manufacturer guidelines ensures long-term performance.
Step 1: Prepare the Subfloor Properly
Professional results begin with preparation.
Inspect the Subfloor
LVP flooring requires a clean, flat, and structurally sound surface. Most manufacturers specify that subfloor variation should not exceed 3/16 inch over 10 feet.
Subfloors can be:
- Concrete slabs
- Plywood
- OSB
- Existing tile (if properly bonded and flat)
Address Moisture
Moisture testing is especially important on concrete slabs. ASTM standards recommend moisture testing before installation. Excess moisture can cause flooring failure, even with water-resistant materials.
In areas along I-85 where humidity can fluctuate, such as Greenville and Atlanta, testing is not optional. It protects your reputation as a contractor and the homeowner’s investment.
Level and Clean
- Fill low spots with a leveling compound
- Sand down high spots
- Remove debris and dust thoroughly
Skipping this step often results in visible imperfections and joint stress later.
Step 2: Acclimate the Flooring
While many LVP products require less acclimation than engineered hardwood, most manufacturers still recommend allowing planks to sit in the installation space for 24–48 hours.
Keep room temperature between 65°F and 85°F, depending on product guidelines. Consistent temperature and humidity prevent unnecessary expansion or contraction.
Step 3: Plan the Layout
Professional installers rarely start laying planks without a layout plan.
Measure the Room
- Determine room width and length
- Calculate how many full planks will fit
- Avoid ending with a narrow strip (less than 2 inches)
If necessary, trim the first row slightly so both sides of the room have balanced plank widths.
Stagger the Seams
Maintain a minimum stagger distance of 6 to 12 inches, as specified by the manufacturer. Randomizing the pattern improves structural integrity and visual appeal.
Snap a chalk line along your starting wall to ensure your first row is straight.
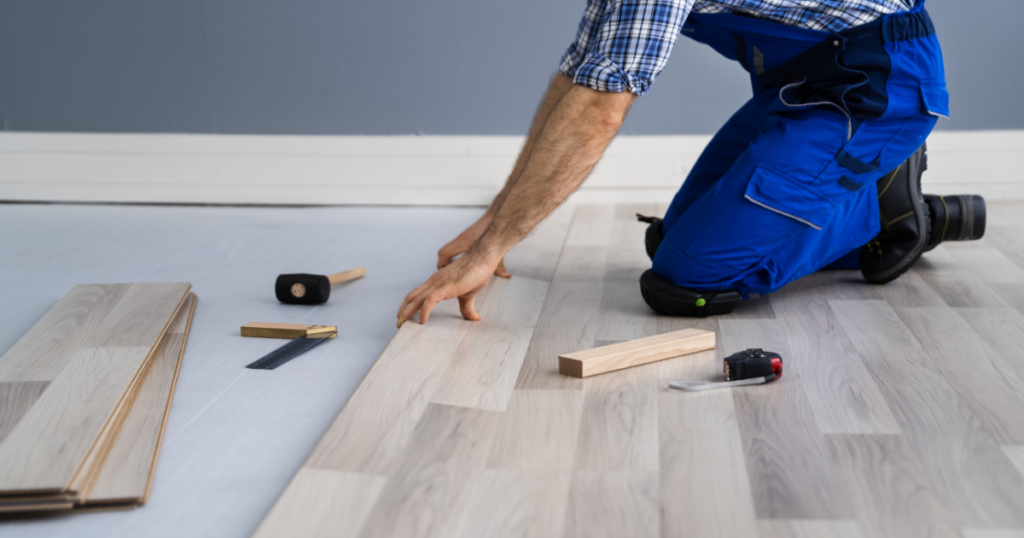
Step 4: Install the First Row
This row determines the alignment of the entire floor.
- Place spacers between the wall and planks to allow for expansion gaps (usually 1/4 inch).
- Install the planks end-to-end, locking them securely in place.
- Ensure the row remains straight.
For click-lock LVP flooring, insert the tongue into the groove at the recommended angle and press down until it locks. Use a tapping block gently if needed.
Never force planks together. If resistance occurs, check alignment.
Step 5: Continue Row by Row
After the first row is installed:
- Cut the first plank of the next row to maintain stagger.
- Insert the long edge first.
- Lock the short end joints.
- Use a tapping block and mallet if required.
Work steadily across the room.
Around Door Frames
- Undercut door jambs using a jamb saw.
- Slide planks underneath for a clean finish.
Around Obstacles
Use a template to mark cuts for vents or irregular shapes. A sharp utility knife works for straight cuts, while a jigsaw may be needed for complex cuts.
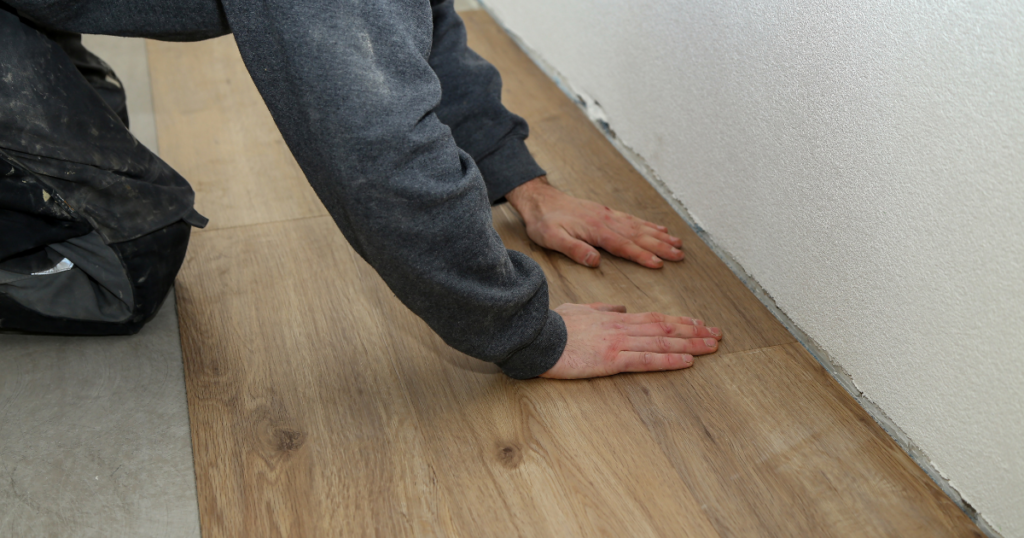
Step 6: Install the Final Row
The last row often requires lengthwise cutting.
- Measure carefully, accounting for expansion space.
- Use a pull bar to lock the final planks into place.
Take your time here. This is where uneven walls become noticeable.
Step 7: Finishing Touches
Once planks are installed:
- Remove spacers
- Install baseboards or quarter round
- Install transition strips at doorways
- Clean the floor according to manufacturer guidelines
Avoid heavy furniture placement for at least 24 hours unless otherwise specified.
Common Mistakes to Avoid
Even experienced contractors can make preventable errors.
Ignoring Expansion Gaps
Without expansion space, LVP flooring can buckle under temperature changes.
Skipping Moisture Testing
Water-resistant does not mean waterproof under all conditions. Subfloor moisture can still cause issues.
Poor Subfloor Prep
Uneven surfaces lead to premature joint wear.
Not Following Manufacturer Guidelines
Each product may have specific installation requirements. Always review technical documentation.
How Proper Installation Impacts ROI
The true value of luxury vinyl plank flooring goes beyond initial cost. According to remodeling cost studies, quality flooring consistently ranks among the top upgrades for resale value.
Professional installation:
- Reduces callbacks
- Improves durability
- Increases homeowner satisfaction
- Protects contractor margins
For pros sourcing discount flooring without sacrificing quality, proper installation ensures the best-value flooring truly delivers long-term results.
LVP vs Engineered Hardwood Installation Considerations
While engineered hardwood offers the natural wood construction of solid hardwood, LVP flooring is generally faster to install and more forgiving.
Engineered Hardwood
- May require nail-down or glue-down methods
- More sensitive to moisture
- Often, a longer acclimation period
LVP Flooring
- Commonly click-lock floating installation
- Lower maintenance
- Faster project turnaround
Choosing the right material depends on job site conditions and client goals.
Supporting Pros Along the I-85 Corridor
The Flooring Supply is relocating its headquarters from Atlanta to Greenville, strengthening its presence in the Southeast while continuing to serve flooring customers in Atlanta, Greenville, and Charlotte, as well as nationwide.
Working with reliable suppliers ensures access to high-quality flooring at competitive prices for homeowners and contractors alike. This relationship simplifies the ordering process, improves job efficiency, protects margins, and allows for materials to be shipped directly to job sites.
Install With Confidence
Installing LVP flooring like a pro comes down to preparation, precision, and patience. When subfloors are properly prepared, layouts are carefully planned, and manufacturer guidelines are followed, LVP flooring delivers durable, attractive results that hold up for years.
If you are a contractor looking to streamline sourcing or a homeowner ready to upgrade your space, The Flooring Supply offers high-quality flooring options, including LVP, LVT, and engineered hardwood.
To explore available products or learn more about visit: https://theflooringsupply.com/
Partner with a supplier that understands flooring across Greenville, Atlanta, Charlotte, and everywhere in between.